Have a Question?
-
Injection Sprayers
-
-
-
- ASM-3320-V2 – Skid Honda Engine / Water Pump Assembly
- Water Pump Inlet Plumbing V3 – Skid – Gas
- Water Pump Inlet Plumbing V3 – Skid – Hydraulic
- Water Pump Outlet Plumbing V3 - Skid - Gas
- Water Pump Outlet Plumbing V3 - Skid - Hydraulic
- Water Pump Outlet Plumbing V4 - Skid - Gas
- Water Pump Outlet Plumbing V4 - Skid - Hydraulic
-
-
- RS6000 Gas Injection Skid Sprayer Manual V5.0
- RS6000 Gas Injection Skid Sprayer Manual V6.0
- RS6000 Gas Injection Skid Sprayer Manual V6.0 w/ Cannon Plug
- RS6000 Gas Injection Skid Sprayer Manual V6.1
- RS6000 Gas Injection Skid Sprayer Manual V6.1 w/ Cannon Plug
- RS6000 Gas Injection Skid Sprayer Manual V6.3 w/ Cannon Plug
- RS6000 Gas Injection Skid Sprayer Manual V6.4
- RS6000 Gas Injection Skid Sprayer Manual V6.4 w/ Cannon Plug
- RS6000 Gas Injection Skid Sprayer Manual V6.5
- RS6000 Gas Injection Skid Sprayer Manual V6.5 w/ Cannon Plug
- RS6000 Gas Injection Skid Sprayer Manual V6.6 w/ Cannon Plug
-
Anti-Icing Sprayers
-
Search Support
Categories
Distance Calibration
Introduction
It is important to field calibrate the distance sensor to insure optimum accuracy! The distance calibration must be periodically checked. This is especially important if the sensor has come loose or been repositioned (radar sensor) or if the tires have been changed (wheel and speedometer sensor).
Use the following initial calibration settings to get started. For a radar this number will be pretty close. For a wheel speed sensor or a speedometer sensor, the adjustment to this initial calibration number may be very large, depending on the configuration of the vehicle.
Radar Units
Dickey-john RVS II
Starting Calibration Number - 1000
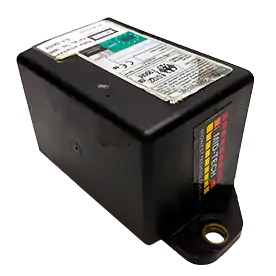
Mid-Tech Compact Radar
Starting Calibration Number - 780
Procedure
- Measure out a known distance of 400 feet or more. Make it an easy place to maneuver the vehicle. The longer the distance, the more accurate the result of the test will be. Keeping the distance in even hundreds of feet will make the calculations easier.
-
Fill the main tank half full of water to approximate actual load conditions.
This minimizes the effect on the radar mounting angle and/or actual working diameter of the tires as the main tank empties.
- Check the distance calibration number by setting TASC switches to the following positions:
Power ON Mode Switch SETUP Display Selector Distance All pump and boom switches should remain OFF during the entire procedure.- Use the INC/DEC switch to select the suggested initial distance calibration value, if needed. Record the calibration number.
- Drive the vehicle to the starting point of the distance range and stop.
- Flip the Mode Select switch to OPERATE and hold the INC/DEC switch down for approximately 3 seconds to clear the accumulated distance.
- Start driving and maintain a speed between 5 and 10 MPH. The distance will start to accumulate on the display.
- Stop the vehicle at the end marker. The display shows the accumulated distance, record this number. Compare this distance to the actual measured distance to determine how much of a correction is necessary.
- Calculate the new Distance Calibration Number using the following formula:
- Check the distance calibration number by setting TASC switches to the following positions:
- Change the mode switch to SETUP to view the distance calibration number.
- Use the INC/DEC switch to adjust the calibration number to the new calculated calibration number.
- Change the mode switch to operate. The TASC should display your measured distance value.
Example
An operator decided to perform a distance calibration. The operator found that the existing calibration number programmed in the TASC console is 1000. After driving a measured distance of 400 feet the TASC console displays 396 feet.
The result of driving 396 feet over a 400 foot range gives an error of 1.00%
Plugging the values from this test into the above equation gives a new calibration number of 1010.